Experiments & AB Test
Using Prefab for Experimentation & AB Testing
There are 4 parts to running experiments:
1) Bucketing
What arm of the experiment should a user be in? The control or a treatment? Sometimes this is a simple 50/50 split. Sometimes you want to take into account a "holdout group" or a "never experiment on these users" group. Sometimes you only want to experiment on Paid CPC traffic or some other user characteristic. Sometimes you want to experiment on a team level instead of user level. Or perhaps experiment by infrastructure instance. All of these questions are answered by "bucketing".
2) Exposure Tracking
Now that we know which bucket the user is in, we need to write this down someplace. It's important to think of this separately from bucketing. A common mistake can occur when the code that evaluates buckets automatically records the exposure. Imagine experimenting with the contents of a modal. The underlying page will have made the request to get the experiment buckets, but we shouldn't record exposure until the modal is actually rendered.
3) Conversion / Metric Tracking
Conversion tracking is where we track order-placed or add-to-cart or cpu-usage or whatever the goal of our experiment is. This is likely already in your system of record.
4) Analysis
This is the big one. We need a tool that will look at our funnel from Exposure to Conversion. We are almost certainly going to want to be able to segment the data and slice and dice. We are making business decisions based on the results here, so we should do analysis in the source of truth. This is often the data warehouse and whatever analysis tool you have on top of it, but it may also be your product analytics suite.
The Prefab Approach
Prefab is designed to give you a terrific solution to targeting & bucketing, that works with your existing analysis tool. In order to do AB test analysis inside a FeatureFlag tool, you would need to extract the conversion data and analysis segments from your source of truth and ingest them in the FeatureFlag tool. While not impossible, this leads to multiple sources of truth and conflicting results. So choose the analysis tool that works for your org and Prefab will turn it into an experiment machine.
Example - Setting up an Experiment in Mixpanel
Let's walk through an example of adding experimentation to Mixpanel by bucketing users in Prefab.
First we'll create a new experiment: experiment.ex-2.bigger-button. We'll do it as type string rather than a boolean so that we can have nice Control and Treatment variants (and leave ourselves the option of a Holdout option).
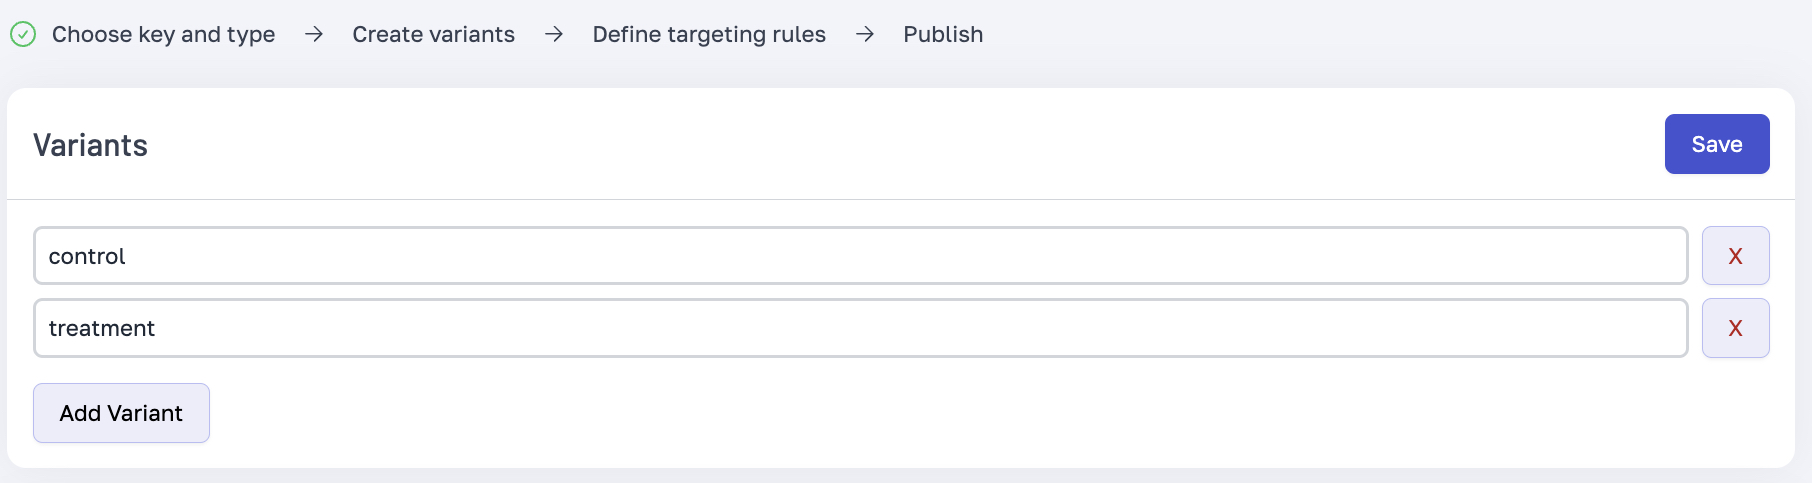
 Next we'll add these
 Control and Treatment variants.
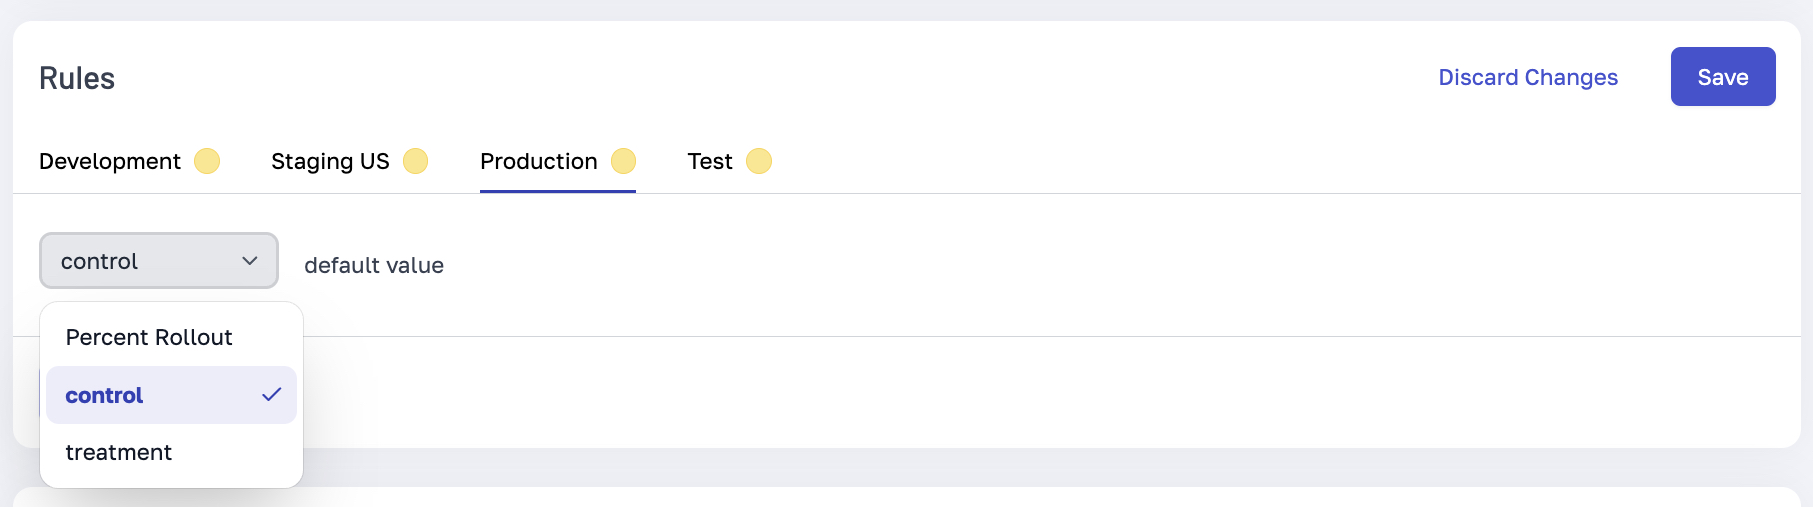
 We'll select
 Perent Rollout for the value.
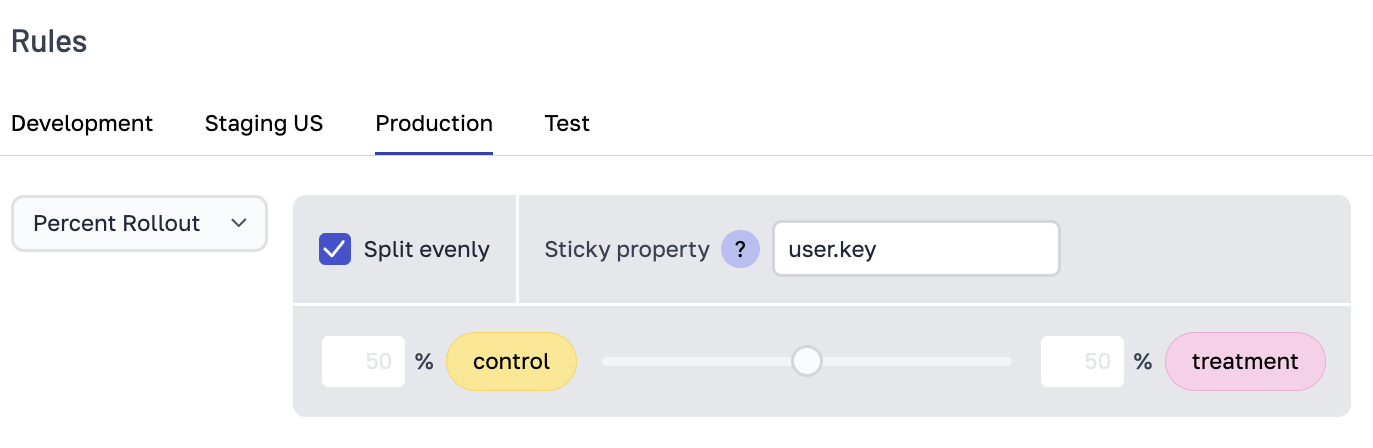
 We can choose to "split evenly". Note the sticky property. This tells us which piece of Context to use to seed the random bucket generator. Our application sets context like
 {user: {key: '123-45f', name: 'Bob Beemer'}} so user.key is the correct way to be sticky here. This will ensure that any user that is bucketed into the Treatment stays in the treatment everytime they use the application.
Setting up Exposure Tracking (Mixpanel example)
Mixpanel has specific event format for tracking experiment exposures. When we expose a user to an experiment, we just need to call mixpanel.track('$experiment_started', {'Experiment name': 'Test', 'Variant name': 'v1'}). The easiest way to integrate this with Prefab is to use the afterEvaluationCallback.
const options = {
    apiKey: window.prefab_api_key,
    context: new prefabNamespace.Context({
        user:
            {
                key: user.tracking_id,
                name: user.user_name
            }
    }),
    afterEvaluationCallback: (key, value) => {
      if (key.startsWith("experiment")) {   // we'll name our experiments to start with 'experiment'
        mixpanel.track('$experiment_started', {
          'Experiment name': key,           // this will be 'experiment.ex-2.bigger-button'
          'Variant name': value             // this will be 'Control' or 'Treatment'
        });
      }
    }
};
We will of course need to actually call the experiment in our code.
if(prefab.get('experiment.ex-2.bigger-button') === "Treatment"){
    // do something new
} else {
    // do existing logic
}
With that setup, we can run our application. 50% of users will see our new and 50% our existing logic.
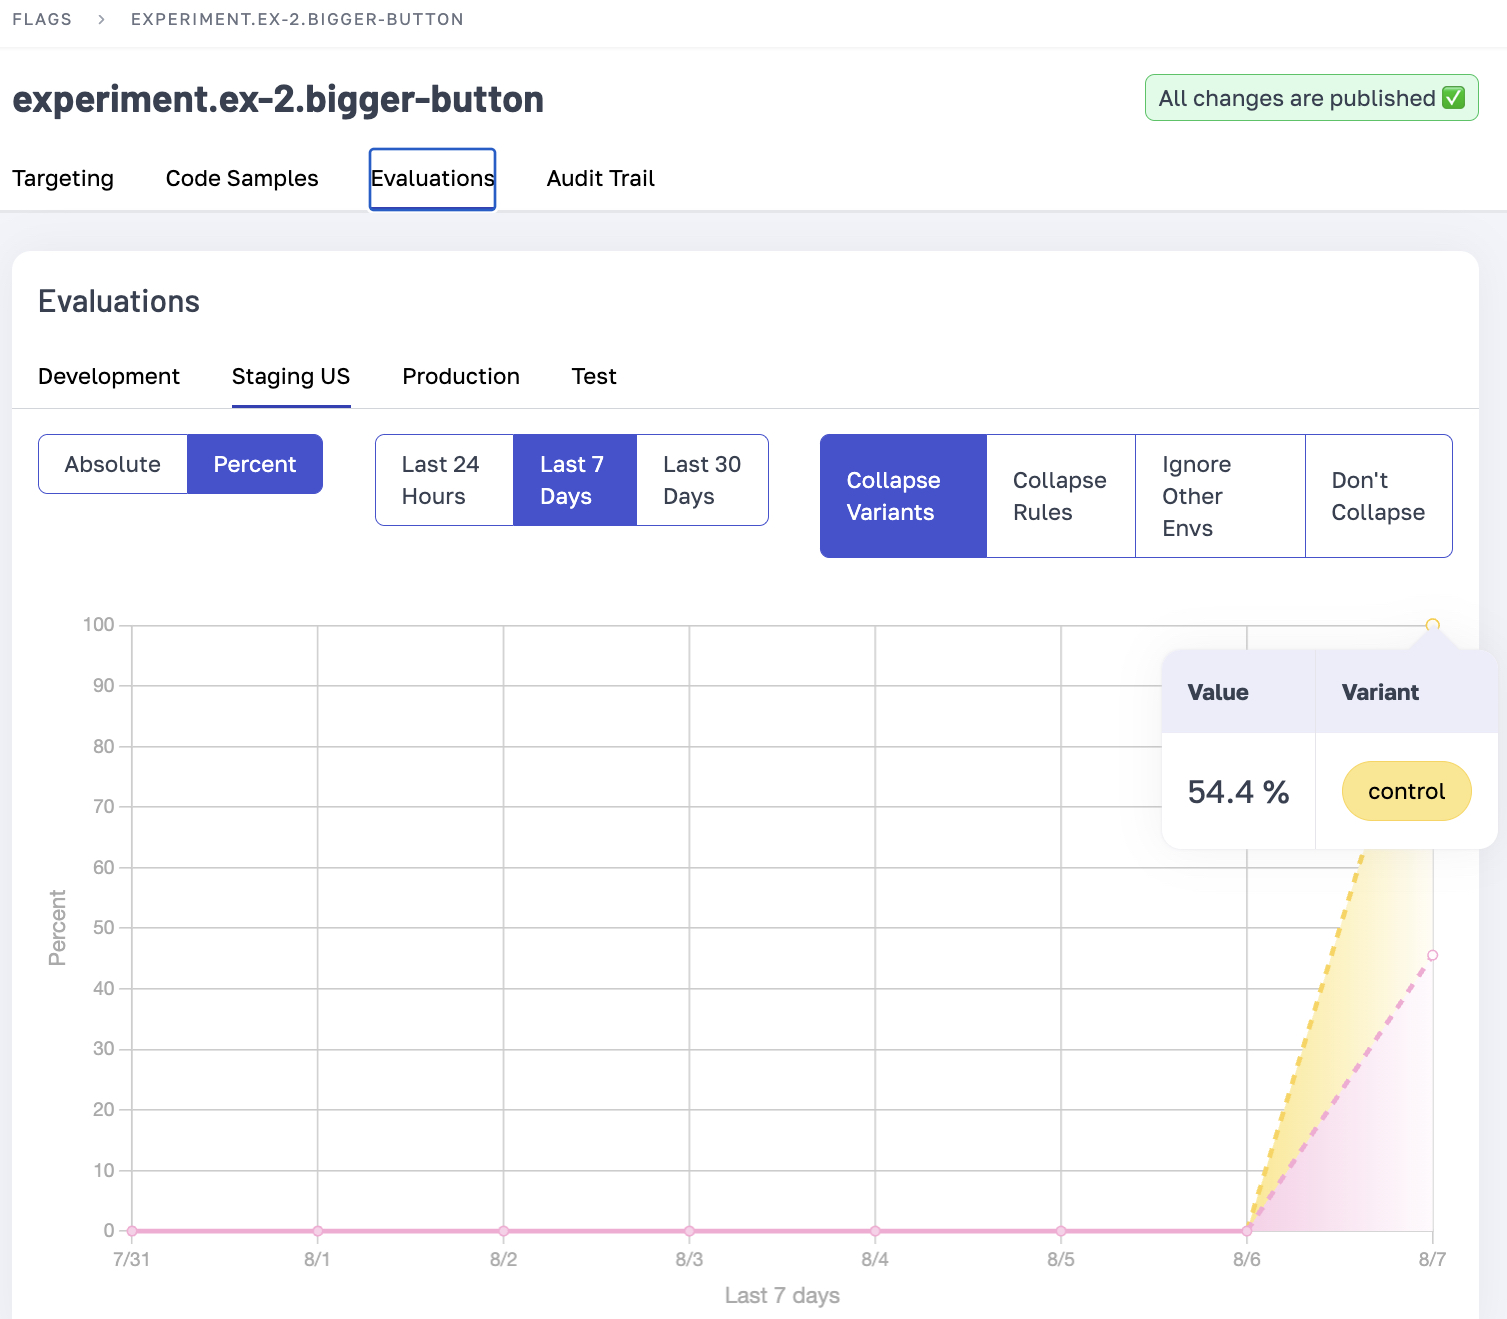
Verifying our Bucketing Evaluations
A crucial part of bucketing is giving you confidence that the bucketing is happening as you expect. Prefab evaluation charts are very useful here. This is showing us that at our low amount of traffic in staging the 50%/50% split is really a 54%/46% split. We'll expect to see this track to 50%/50% over time.
Analyzing our Experiment
In Mixpanel, we can now setup a funnel report. The conversion event for this example will be an event called PrefabLandingPage that we have triggered via basic mixpanel.track('PrefabLandingPage'); calls.
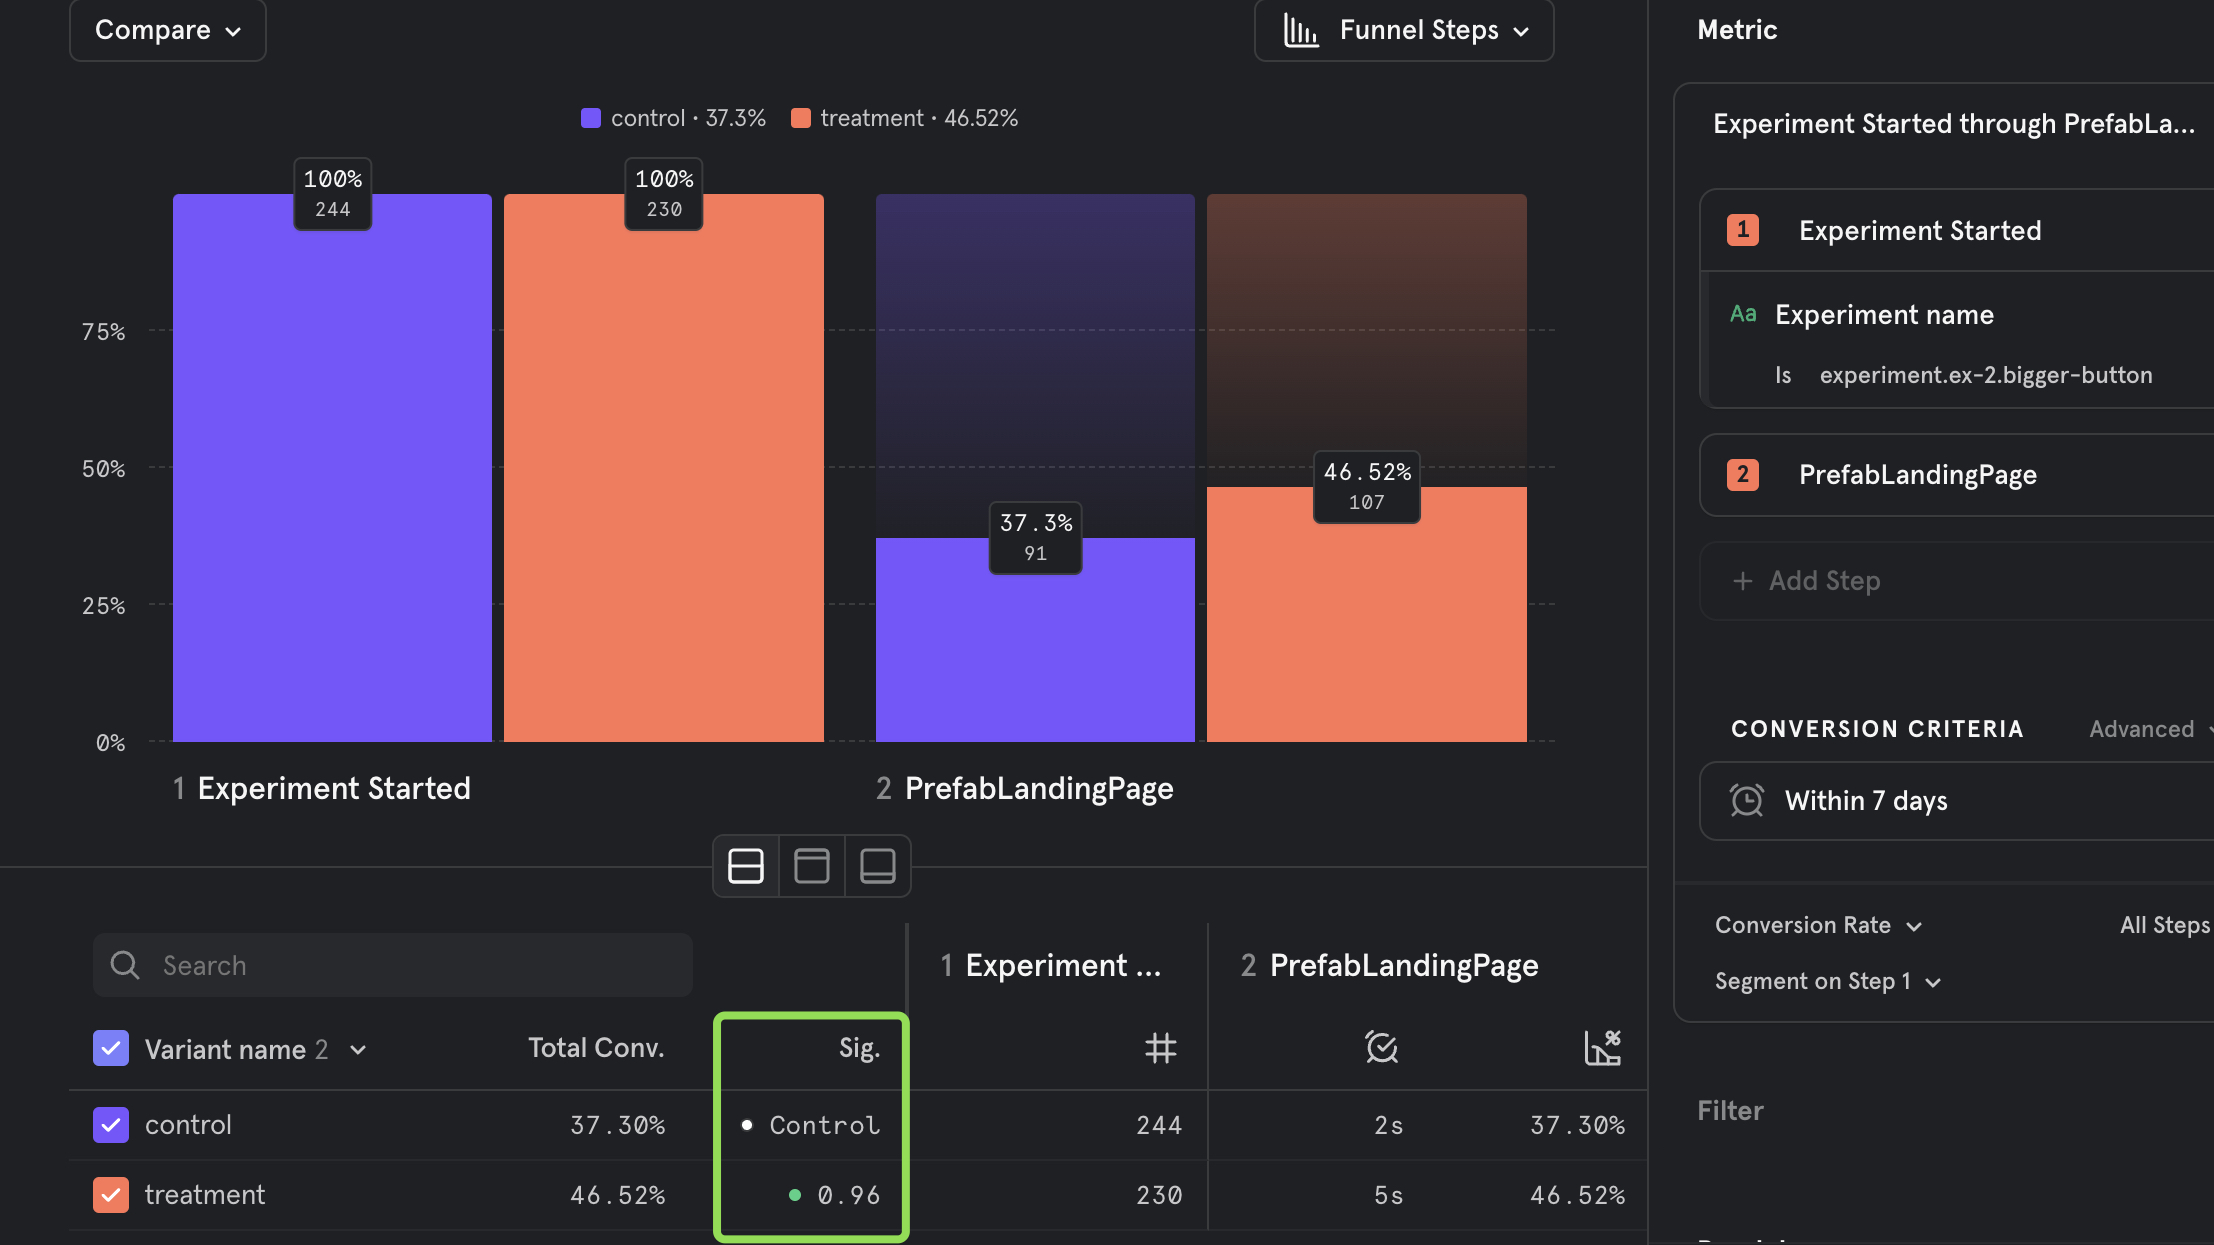
Here's the setup for our two step funnel:

We set the first step of the funnel to be the Experiment Started event, filtered to where the Experiment Name is experiment.ex-2.bigger-button. The second event is conversion goal, in our example PrefabLandingPage.
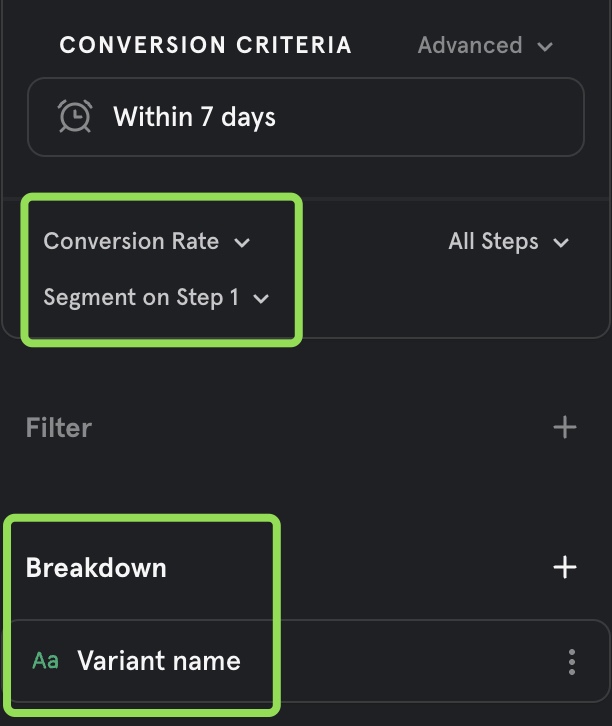
The tricky part is that we can now do a "conversion rate segmentation" and "breakdown". We want to segment on the value of Variant Name in Step 1. Here's what that looks like:
Success! We can see our AB Test in it's full glory. We can see that we have some separation in the conversion rate between the two arms. Mixpanel is actually labeling this as a significant conversion change.
Testing Experiments Locally
As a developer building out the new feature. It's pretty common to want to be able to quickly toggle back and forth between the variants of your experiment. You could do this by just changing the development value, but that will affect everyone on your team.
Prefab's developer tools have you covered. Because the CLI knows who you are, it can easily add and remove a targeted override just for you. Here's what that looks like:
And here's the resulting rule that you'll see in the Prefab UI.
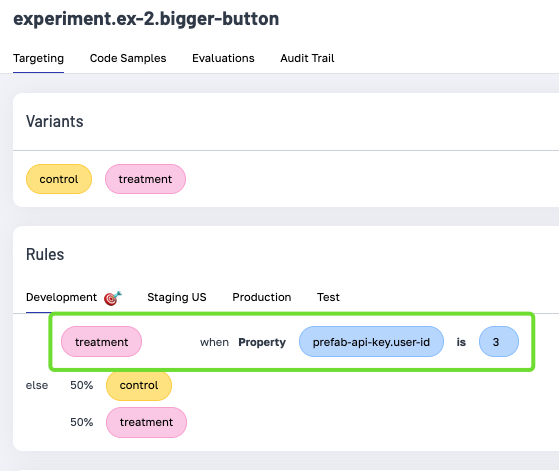
Happy experimenting!